Wednesday, May 26, 2010
How to Pasteurize EGGS
Ok, I love home made mayonaise. I love hollandaise sauce. I love egg nog. I LOVE EGGS !! But I know many people frown on the thought of eating raw eggs, even though humans have been doing just that forever, literally!! Ok, so the USDA showed us how to pasteurize eggs so you don't have to "worry". I prefer raw, sorry just how I am. But for those of you who want to play it "safe", here is the place to go. And yes I will do this with my eggs for mayo I share with others. You just have to scroll down to the bottom, it is the last section. I was just going to copy and paste, but then I thought maybe you wouldn't believe me. ;)
Tuesday, May 25, 2010
Got skills?
Ok, I don't know how my friend Kellene does it, but darn it she nailed another of my articles I was working on! I was thinking about this one last night (not having been on the pc for the day), I had been jotting down notes of what I was thinking about. Skills. ya know, soap making, foraging, building things like smoke houses, shelters, and even how to clean a wild meat. Anyway, she doesn't go into those kind of details, but she brought up some other things I was thinking about and boy she hit it right on! So please go read her awesome article.
Monday, May 24, 2010
StoveTec Rocket Stove

Ok, I am seriously thinking of doing a bulk order of these stoves. They look like they would be fantastic for emergency prep, but ALSO for camping. Wouldn't it be great to have something you could have a double use for? Not something just taking up space, it would be something you can use when camping or during power outages. Here is a website that has a few videos about the stoves. Let me know what you think.
There are two stoves, one for wood only and one for wood or charcoal. I would like to do the one for wood or charcoal. Prices.. Wood only is $35 (24cm) or $45 (26cm) . The wood & charcoal one is $49 (26 cm). So PLEASE let me know what you think.
Friday, May 21, 2010
Give-Away Bosch mixer!!!!
Over at Deals to Meals she is giving away a brand new Bosch Universal Mixer !! I love love love my bosch for making bread! So head on over and check it out and get entered!
Wednesday, May 19, 2010
Blue Chip Group/Augason Farms Close Out sale!
IF you live in Utah, you are in luck, or if you are visiting. Blue Chip Group, now Augason Farms is having a close out sale to get rid of the old label. One of the awesome deals is Red Feather canned butter. This butter is amazing, and is good for 15 years!! So worth the sale price! They have quite a few things on sale, red wheat, oats, morning moos, spiff-y whip, potato stuff, dry cream of soups, etc.. So if you are in Utah or going to be VERY soon, stop by Augason Farms in SLC. Get some stuff for you food storage for great prices :)
Give-Away at Auguson farms!!!
Head on over the Adventures in Self Reliance and check out the giveaway. It is awesome! Easy way to enter! And a great give-away.
Refrigeration.... Are you making mistakes?
There is more than one way to waste money. Eating out, buying shoes that are not needed, buying anything that you already have at home. But also food waste. Making too much with intentions to freeze leftovers, or eat leftovers for lunches.. but then don't. Forgetting to date your leftovers, or properly store them. OR heaven forbid, not handling food correctly in the first place.
Something I DREAD to the utmost degree.. illness. But more than that.. the type of illness, I'm talking about food poisoning. This can make you vomit, get a fever, severe dehydration, diarrhea, stomach cramps, kidney failure, and more. It is dangerous, it is horrible, I loathe it. I do have something I use for it. 30 drops of GSE in 1/3 cup warm water with 1 to 2 tablespoons redmond clay, stirred well, and chugged everyhour.
So did you know that you could accidentally help yourself to get food poisoning? Here are some things to think about. Food borne illnesses are usually caused by food spoilage or improper handling.
So here is a list of some very common mistakes made in the kitchen:
- sloppy wrap job: air is detrimental to your food. Air in the fridge and moisture are your foods enemies. Make sure all lids and caps are on TIGHTLY. Foil and plastic wrap are loose, and can have small holes you don't detect, both cause leakage and are expensive
- store wrap: Isn't it convenient that the store wrapped your meat and made it so pretty on that styrofoam tray? NO. Any original packaging, including plastic wrap should be removed from produce, meats, poultry and deli items. There could be holes you can't see, or a loose flap, but almost always air around the food.
- storing in over sized containers: Like I just said, usually the meat from the store has plastic wrap around it, and there is a lot of air in that package too! Leaving too much space at the top of the container can speed up spoilage and freezer burn. Use the smallest re-usable container possible for refrigerator storage; wrap food for the freezer so it doesn't have any air around it.
- incorrect fridge temp: a few degrees off or temperature fluctuation can mean your food spoiling. The fridge should be set to 38 to 40 degrees Fahrenheit or lower; freezer set to 0 degrees Fahrenheit or lower. Use a separate thermometer to confirm your temperature settings. Too low of a temperature setting in either compartment are energy wasters. Avoid overloading of unchilled food of either compartment that can cause temps to rise above safe levels.
- storing the wrong foods on the fridge door: the door compartments in the fridge are 3 to 5 degrees warmer than the shelves inside so will cause food stored there to spoil faster. Perishables like eggs, milk and fresh deli condiments should not be stores in the door compartments. Reserve this space for foods such as mustard, relishes, and catsup or other sauces.
- hot foods in the fridge: Hot leftovers should be cooled before putting into the fridge or freezer to prevent warming food around it that increases the rate of bacterial growth. Larger pots of soup and chili can be cooled in a sink filled with ice water or transferred to smaller containers for cooling. Be sure to get leftovers into the fridge with in two hours to prevent bacterial growth. Or flies
- relying on the sniff test: The reality is some spoiled (ex.: botulism, Listeria) foods do NOT have any odor yet can make you VERY sick. The NUMBER ONE rule of food storage is if in doubt throw it out! I cannot stress this rule enough. Do NOT rely on the sniff test and never taste any food you think may have spoiled!
- losing track of leftovers: This has happened to everyone. We are busy and sometimes forgetful. Any leftover that has been in the fridge for more than 3 - 4 days should be discarded. I love my sharpies for this reason! My kids and hubby have all learned to date everything that goes into the fridge. If you won't use it within a couple days, is it freezable?
- not repackaging bulk quantities of food: Any family or club pack of meats, poultry or other food should be repackaged in the amount you will use with in a 4 - 5 day period with remaining perishable foods being repackaged for freezing, canning or drying if appropriate for longer term storage. If raw bulk perishable foods cannot be repackaged, they should be cooked then frozen.
- not using appropriate food storage containers:Food containers such as take-out cartons, margarine tubs and yogurt containers may be suitable for very short term refrigerator storage, but they are not suitable for longer term refrigerator or freezer storage. Ideally use glass storage containers with lids in the fridge rather than plastic to prevent any potential leaching issues while the food is cooling or reheating.
Tuesday, May 18, 2010
GIVE AWAY Go Berkey Water Filter System
How simple is this? Just post this in your blog, email Survivalist Blog, and you are entered to win! AWESOME, and I soo need a water filter!
M.D. Creekmore over at the The Survivalist Blog – a survival blog dedicated to helping others prepare for and survive disaster – with articles on bug out bag contents, survival knife choices and a wealth of other survival information is giving away a Go Berkey Water Filter System (a $139.00 value)! To enter, you just have to post about it on your blog. This is my entry. Visit The Survivalist Blog for the details.
M.D. Creekmore over at the The Survivalist Blog – a survival blog dedicated to helping others prepare for and survive disaster – with articles on bug out bag contents, survival knife choices and a wealth of other survival information is giving away a Go Berkey Water Filter System (a $139.00 value)! To enter, you just have to post about it on your blog. This is my entry. Visit The Survivalist Blog for the details.
sites and blogs
Oh my goodness, I was looking at a friends blog, and found another blog that looked interesting. Then I found another.. Then another.. HOLY COW I have INFORMATION CONSTIPATION!!! So much amazing info out there and soo very little time! Wow.. I added some blogs or sites to my blog because I really think they will be beneficial. I added some and took some off. But the two below have TONS AND TONS AND TONS of info on them!
American Preppers Network
Washington Preppers Network
American Preppers Network
Washington Preppers Network
Sunday, May 16, 2010
Chocolate Peanut Butter Oatmeal NO BAKE cookies
1 cup sugar
1/4 cup butter
2 TBS. baking cocoa
1/4 cup milk or rice milk
1/4 cup peanut butter
1 1/2 tsp. vanilla
1 1/2 cups quick oats (NOT INSTANT) or regular oats
Melt butter in pot over medium heat. Add milk, cocoa and sugar; mix together. Mix/melt peanut butter in and add vanilla. Take off heat. Add oats and stir well.
Plop spoonfuls onto plate or waxed paper and let cool until hardened enough to pick up.
Store covered in cool place.
Chocolate Mint Sandwich Cookies
18 min
10 min prep
48 sandwich cookies
1 1/2 cups packed brown sugar
3/4 cup butter
2 tablespoons water
12 ounces semi-sweet chocolate bits
2 eggs
3 cups flour
1 1/4 teaspoons baking soda
1 teaspoon salt
Filling
3 cups confectioners' sugar
1/3 cup butter, softened
4-6 drops peppermint extract or mint extract
2 drops green food coloring (optional)
2-4 tablespoons milk
Preheat oven to 350 degrees F.
Cookies: Combine brown sugar, butter and water in large, heavy-duty saucepan.
Cook over med heat, stirring occasionally, until butter is melted.
Add chocolate bits; cook, stirring for 1 to 2 minutes or until smooth.
Remove from heat and cool.
Add eggs one at a time, beating well after each addition.
Stir in flour, baking soda and salt.
Drop by rounded teaspoon onto ungreased baking sheets.
Bake for 6 to 8 minutes or until edges are set.
Cool on baking sheets for 1 minute;.
Remove unto wire racks& cool.
Filling: Beat confectioners sugar, 1/3 cup butter and mint extract in large mixer bowl.
Add milk until smooth and of desired spreading consistency.
Spread about 2 teaspoons filling onto flat side of 1 cookie; top with second cookie, flat side down.
Squeeze together gently.
Japanese Pumpkin Soup (kabocha)
35 min
10 min prep
SERVES 4
1 lb japanese kabocha squash**
1 small onion, thinly sliced
3/4 cup milk ***
2 chicken bouillon cubes*
2 1/3 cups water
1 tablespoon butter
salt and pepper (to season)
Cut pumpkin in half and remove seeds.
Place pumpkin on a plate and heat in microwave for one minute (optional).
Slice pumpkin thinly.
Heat butter in saute pan and cook onion slices until softened (or golden).
Add pumpkin slices to the pan and saute.
Add chicken bouillon and water and simmer vegetables until softened.
When cooked, whirl the vegetables and broth in a blender or food processor until smooth, or use a stick blender.
Return to the pan and add milk.
Heat the soup over low heat.
Season with salt and pepper to taste.
*I use homemade chicken stock as bouillon has corn in it. Sometimes I add more liquid so it isn't too thick.
** It is hard to find a 1 pound kabocha. I usually use a 4 pound and adjust the recipe for that.
*** I use a half to whole can of coconut milk as Jaslyn is allergic to milk. This gives a wonderful creaminess.
Alfredo Sauce (quick and easy!)
This is a quick and easy alfredo sauce, and I always seem to have the ingredients on hand. I don't claim it is authentic, but it is tasty, with the addition of garlic.
10 min
5 min prep
SERVES 4
1/4 cup butter
4 ounces package cream cheese
2 teaspoons garlic powder or 1 or 2 fresh cloves garlic, minced *
1 to 2 cups milk (about)
1/4 to 1/2 cup fresh grated parmesan cheese (can use stuff in can, just not as good)
1/8 teaspoon ground black pepper
Melt butter in a medium, non-stick saucepan over medium heat.
Saute' garlic for 1 minute but do not brown; OR add garlic powder, then add cream cheese stirring with wire whisk until smooth.
Add milk, a little at a time, whisking to smooth out lumps.
Stir in Parmesan and pepper.
Remove from heat when sauce reaches desired consistency.
Sauce will thicken rapidly, thin with milk if cooked too long.
Toss with hot pasta to serve.
*I have also used Johnny's Garlic Spread seasoning from costco. I change what I use all the time, depending on what I grab from the spice rack
Raw milk.. for what?
A few days ago I sent out an email about Raw milk. Yes I have a source of Raw milk, and I am very excited about it. Why? Well, raw milk is the best for making cheeses and yogurt. And the health benefits of raw milk are amazing. The farm I am using is certified organic, and has been cleared through all departments that it can sell raw milk LEGALLY. It is a very clean farm.
I am very excited to be a new drop site for raw milk in the Issaquah area. I have a very cold fridge with plenty of room for milk.. If you'd like to order it is $3.50 a half gallon and $7 a gallon. Depending on demand I will have drops bi-monthly or weekly.
I am very excited, and I want to learn to make cheese.. I already make my own yogurt. So email me if you'd like to order some !
Loose Meat Sandwiches
Here is a recipe that is one of Drew's favorites. I will tell you my changes here.. instead of ground beef, we use ground chicken. We like the flavor better. Make sure you make the meat very tiny when browning.
The loosemeat was created in 1924 at Ye Old Tavern-now Gus' Family Restaurant on 14th and Jackson St. in Sioux City, Iowa. Nowadays you will find the original sandwich served at Bob's Drive Inn on Hwy 75, LeMars, Iowa just a mile or so out of Sioux City, at The Tastee Inn and Out, on Gordon Drive and at Miles Inn on Leech Ave. among others. If you see a recipe for loosemeats that contains tomato juice-run! A loosemeat is a sloppy joe without the slop-so stay away from anything tomato-ey please! These little sandwiches are great for football parties, slumber parties, or just anytime you want a real taste of Americana cooking that takes just a few minutes with very little cleanup. These are typical Iowa tavern fare.
The loosemeat was created in 1924 at Ye Old Tavern-now Gus' Family Restaurant on 14th and Jackson St. in Sioux City, Iowa. Nowadays you will find the original sandwich served at Bob's Drive Inn on Hwy 75, LeMars, Iowa just a mile or so out of Sioux City, at The Tastee Inn and Out, on Gordon Drive and at Miles Inn on Leech Ave. among others. If you see a recipe for loosemeats that contains tomato juice-run! A loosemeat is a sloppy joe without the slop-so stay away from anything tomato-ey please! These little sandwiches are great for football parties, slumber parties, or just anytime you want a real taste of Americana cooking that takes just a few minutes with very little cleanup. These are typical Iowa tavern fare.
Ingredients
· 1 tablespoon fat like lard or Crisco (if meat is round or sirloin)
· salt and pepper, to taste
Directions
1. Get out a cast iron skillet-they are the best for loosemeats-or other kind if you have no iron skillet.
2. Melt fat over medium heat and lightly salt bottom of skillet.
3. Break ground beef up in skillet and start crumbling it with the back of a wooden spoon-this is very important-the meat must end up being cooked up into small crumbles.
4. Add chopped onion while browning meat.
5. Keep working with the back of spoon to break up meat.
6. When meat is browned, drain off any fat and return meat to skillet.
7. Add mustard, vinegar, sugar, and just enough water to barely cover meat in the pan.
8. Cook, at a simmer, till water is all cooked out-between 15-20 minutes.
9. Adjust salt and pepper to taste.
10. Heat your hamburger buns-they're traditionally steamed for loosemeats-I like mine toasted lightly-do it the way you like it.
11. When buns are warm, put yellow mustard on them and add some dill pickle slices-I put on lots!
*If you start changing this recipe and using things like olive oil for the fat and Dijon or honey mustard for the yellow mustard, you will not get the traditional yummy taste of a loosemeat sandwich.
Likewise, don't add any liquid smoke or Worcestershire sauce.
Make them just like this the first time so you can sample the simplicity of this famous Midwestern treat.
If you want to start making changes after that by all means do so but I'd like you to taste the original recipe at least once.
Serve with homemade potato salad and chips
Rice Pudding
1 1/2 cup cooked rice * #
2 cup milk, divided
1/3 cup sugar
1/4 tsp. salt
1 egg. beaten
1 TBS butter
1/2 tsp. vanilla extract **
Heat milk, sugar, salt and rice over medium heat, whisking continually, until thick and creamy, about 15 to 20 minutes. Temper egg by whisking in a separate bowl and slowly drizzling 2 TBS hot rice mix into it. Then add to rice while whisking. Cook 1 minute. Add remaining 1/2 cup milk. Cook about 30 seconds to 1 minute. Remove from heat. Stir in butter and vanilla. Serve warm.
*3/4 cup uncooked rice cooked in 1 1/2 cups water, then follow directions
# I used Homai California Calrose rice from costco (or SFWY)
** I used 1/4 tsp EACH vanilla and lemon extract
Crock Pot Chocolate Mud Cake
1 cup flour
2 tsp baking powder
6 TBS butter
2 ounces semi sweet chocolate or chocolate chips
1 cup sugar, divided (2/3 and 1/3)
3 TBS dutch-processed cocoa powder (any BAKING cocoa powder is fine), PLUS
1/3 cup duch-processed cocoa powder
1 TBS vanilla extract
1/4 tsp. salt
1/3 cup milk
1/3 cup brown sugar
1 1/2 cups hot water
whipped cream or ice cream
Coat the inside of a 2 1/2 quart to 5 quart slow cooker or crock pot with paper from butter cube ( you know, the ones you save to grease the pan with).
Whisk together the flour and baking powder in a medium bowl and set aside.
In a large bowl, melt the butter and chocolate in the microwave or over a pan of simmering water and mix well.
Whisk into the chocolate mix: 2/3 cup of the sugar, 3 TBS of cocoa, vanilla, salt and milk.
Add the flour mixture and stir until thoroughly mixed.
Pour the batter into the slow cooker and spread it evenly.
In a medium bowl, whisk together the remaining sugar, cocoa and hot water until the sugar is dissolved.
Pour the mixture over the batter in the crock pot.
Cover and cook on high for 1 hour 15 minutes to 2 hours 15 minutes, depending on size of the crock pot.
Even when done, the cake will be very moist and floating on a layer of molten chocolate, but you will know it is ready when nearly all of the cake is set and the edges begin to pull away from the sides of the pot.
NOTE: the cake's cooking time and final appearance will vary depending on your crock's size and how hot it runs.
*** I usually double this recipe for my 5 quart !!
Red Bean and Quinoa Chili
1 can kidney beans, rinsed & drained (also can use black beans or cannelini beans which are white kidney beans)
1 TBS olive oil
1 medium onion, chopped fine
1 tsp salt
2 large carrots, washed and shredded (on a cheese grater)
1 green pepper, chopped (I don't use this do to allergy)
1 red pepper, chopped
3 cloves garlic, minced
2 tsp. cumin
1 tsp. dried oregano
1/4 tsp cayenne ( I didn't have any so I used a dash or two of chili powder )
1/4 tsp cinnamon ( I use only 1/8 tsp.)
2/3 cup quinoa, rinsed in warm water for about 5 to 10 minutes (in a fine mesh sieve) & drained
1 cup frozen corn (OMITTED due to MAJOR ALLERGY)
2 cups tomato sauce
1 to 4 cups water (recipe calls for 1 but I usually end up adding more sometimes up to 4 or 5 cups water total)
Heat oil in stockpot over medium heat. Add onions, and saute' until tender. Add salt, garlic, carrots, peppers and spices; saute' for 5 -10 minutes. Add rinsed quinoa and stir in. Add corn, tomato sauce, and water. Simmer together 20 minutes. Add beans to the pot and simmer another 15 minutes.
Makes 6-8 (1 cup) servings We usually serve this with Jaslyn Bread (our version of corn bread) and salad.
Lori's Hummus Recipe
1 can Chick Peas/Garbanzo Beans – drained
1/8 cup olive oil
1/8 cup lemon juice
1 tsp coarse ground black pepper
1 Tablespoon – Tahini paste
2 tsp – Badia Complete Seasoning – it is a blend of salt, garlic, onions and parsley.
1 tsp – dry crushed red peppers (more if you like it spicy!)
Blend in blender or food processor & serve with pita or tortilla chips. We also have this with toast.
ENJOY!
*Badia Complete Seasoning is not something I have looked for locally yet. So we use Cajun Bayou Seasoning by McCormick. IF and when I find Badia, I will let you know where to get it. The taste is amazing.
Granola
9 cups rolled oats, or rolled grains (kamut, rye, barley, wheat, oats)
1 1/2 cup whole wheat flour
1 1/2 cup white flour
2 1/4 cups brown sugar
1 1/2 cups coconut
1 teaspoon salt (optional)
2 1/4 tsp. cinnamon
1 TBS real vanilla extract
1 1/2 cup oil (I use grape seed)
3/4 cup cold water
Combine dry ingredients, in separate bowl combine vanilla, oil and water. Pour wet ingredients into dry mix. Mix well, breaking up clumps. Spread evenly on cookie sheets. Bake in HOT 325 degree oven for 40 minutes, stirring halfway through cooking. When done, let cool completely on cookie sheets then put in air tight container.
Wheat Thins
Deseret Recipes 1981
Mix in large mixing bowl:
1 3/4 cups whole wheat flour
1 1/2 cups all-purpose flour
Mix in blender or beat:
1/3 cup oil
3/4 teaspoon salt
1 cup water
Add liquid mixture to dry, mixing well but as little as possible.
Roll as thin as possible on unoiled cookie sheet- not more than 1/8" thick. Mark with knife for size crackers desired, but do not cut through. Prick each cracker a few times with fork. Sprinkle lightly with salt or onion salt if desired.
Bake at 350 degrees until crisp and light brown, about 30 minutes.
** My notes. We just mixed the oil, salt and water in the pyrex measure cup with a fork. My rolling pin would not let me roll them that thin on the cookie sheet, so instead I divided the dough into 4 pieces and rolled each out on my tupperware pie crust plastic thing, then inverted it on to the cookie sheet and gently with out stretching let gravity help the dough fall onto the cookie sheet. We used REAL salt to sprinkle with.. Jaslyn LOVED these! So did Evelyn. 30 minutes was perfect timing, but you have to roll them super super thin! which does not take much work. Loading my kids into the truck to go somewhere was harder than making these! They were not sticking to the cookie sheet at all! We removed them to a wire rack to cool. When cold, we carefully broke them along the score marks. Awesome! Honestly, this is one of the few Deseret recipes I have tried and it was success! Guess we need to dig out our old Deseret cookbooks!
Thursday, May 13, 2010
Busy.. baking
Well, it is finally sunny out today!! Hurrah, my garden needs it. BUT, I am not outside, nope, I am making breakfast while Peaches cleans the chicken coop. Then I am off with Russ for a bit. BUT later we are working in the garden, possible building another raised bed (I HOPE), maybe moving another raised bed to a better spot. Cutting the grass again.. maybe a BBQ later? Who knows, I just know that the sun makes me happy! And after a night of not being awakened by the Princess due to her asthma, I am refreshed.. a bit. :)
I have been baking this week, and taking pictures, I hope to share the recipes and pictures later, when it isn't sunny out ;)
I have been baking this week, and taking pictures, I hope to share the recipes and pictures later, when it isn't sunny out ;)
Friday, May 7, 2010
Oranges, Lemons and Limes, OH MY!

So to start with, wide mouth or the jars with the separate rubber seal are the easiest to use (I prefer the jars with the orange rubber seal that is separate). No, my oranges did not end up staying together, but it's ok.

10 limes
1/3 cup PICKLING or CANNING SALT (NOT iodized/table salt)
3 whole green cardamom pods
1 bay leaf
AFTER 1 WEEK:
1 cup freshly squeezed lime juice
1. Place jar in dishwasher and sanitize. Wahs plastic storage lid or two-piece metal lid.
2. Scrub limes gently under running water. Trim off stem end. Working with one lime at a time, place stem end down on cutting board and using a serrated knife, cut lime lengthwise into quarters, almost, but not all the way through. Repeat with remaining limes.
3. Take clean HOT jar and place on counter. Holding lime over the jar, pack a heaping teaspoon of the salt inside the cuts, of the lime and place in the jar, cut side up. Repeat with remaining limes, packing tightly to fit as necessary. Add cardamom pods and by leaf. Sprinkle the remaining salf over top. Wipe rim and place lid on jar. Shake jar gently.
4. Place jar in a col, dark place and let stand for 1 week, gently rotating jar daily to swirl juices and salt around the limes.
After 1 week:
Remove limes from jar and place them back in the jar in reverse order (so the ones from the bottom are now on top). Add enough of the lime juice to cover the limes by about 1/2-inch. Store in a cool, dark place for 3 weeks. The lime rind should be almost translucent and most of the salt should be dissolved. After 3 weeks, transfer the jar to the refrigerator and store limes for up to 1 year.
To USE:
Cut the desired size piece of lime, returning the remaining lime to the jar. Scrap flesh and membranes from the lime rind. Cut rind into thin slices or mince to use in recipes.


5 lemons
1/3 cup PICKLING or CANNING salt
3 whole cloves
1 stick cinnamon (about 3-inches long)
AFTER 1 WEEK:
1 cup freshly squeezed lemon juice
Same directions as for lemons, only cut into sixths almost all the way through, and pack a scant 1 tablespoon of the salt inside the cuts of the lemon.
To USE:
Cut the desired size piece of lemon, returning the remaining lemon to the jar. Scrape flesh and membranes, and some of the white pith if it is thicker than 1/8-inch, from the lemon rind. Cut rind into thin slices or mince to use in recipes.
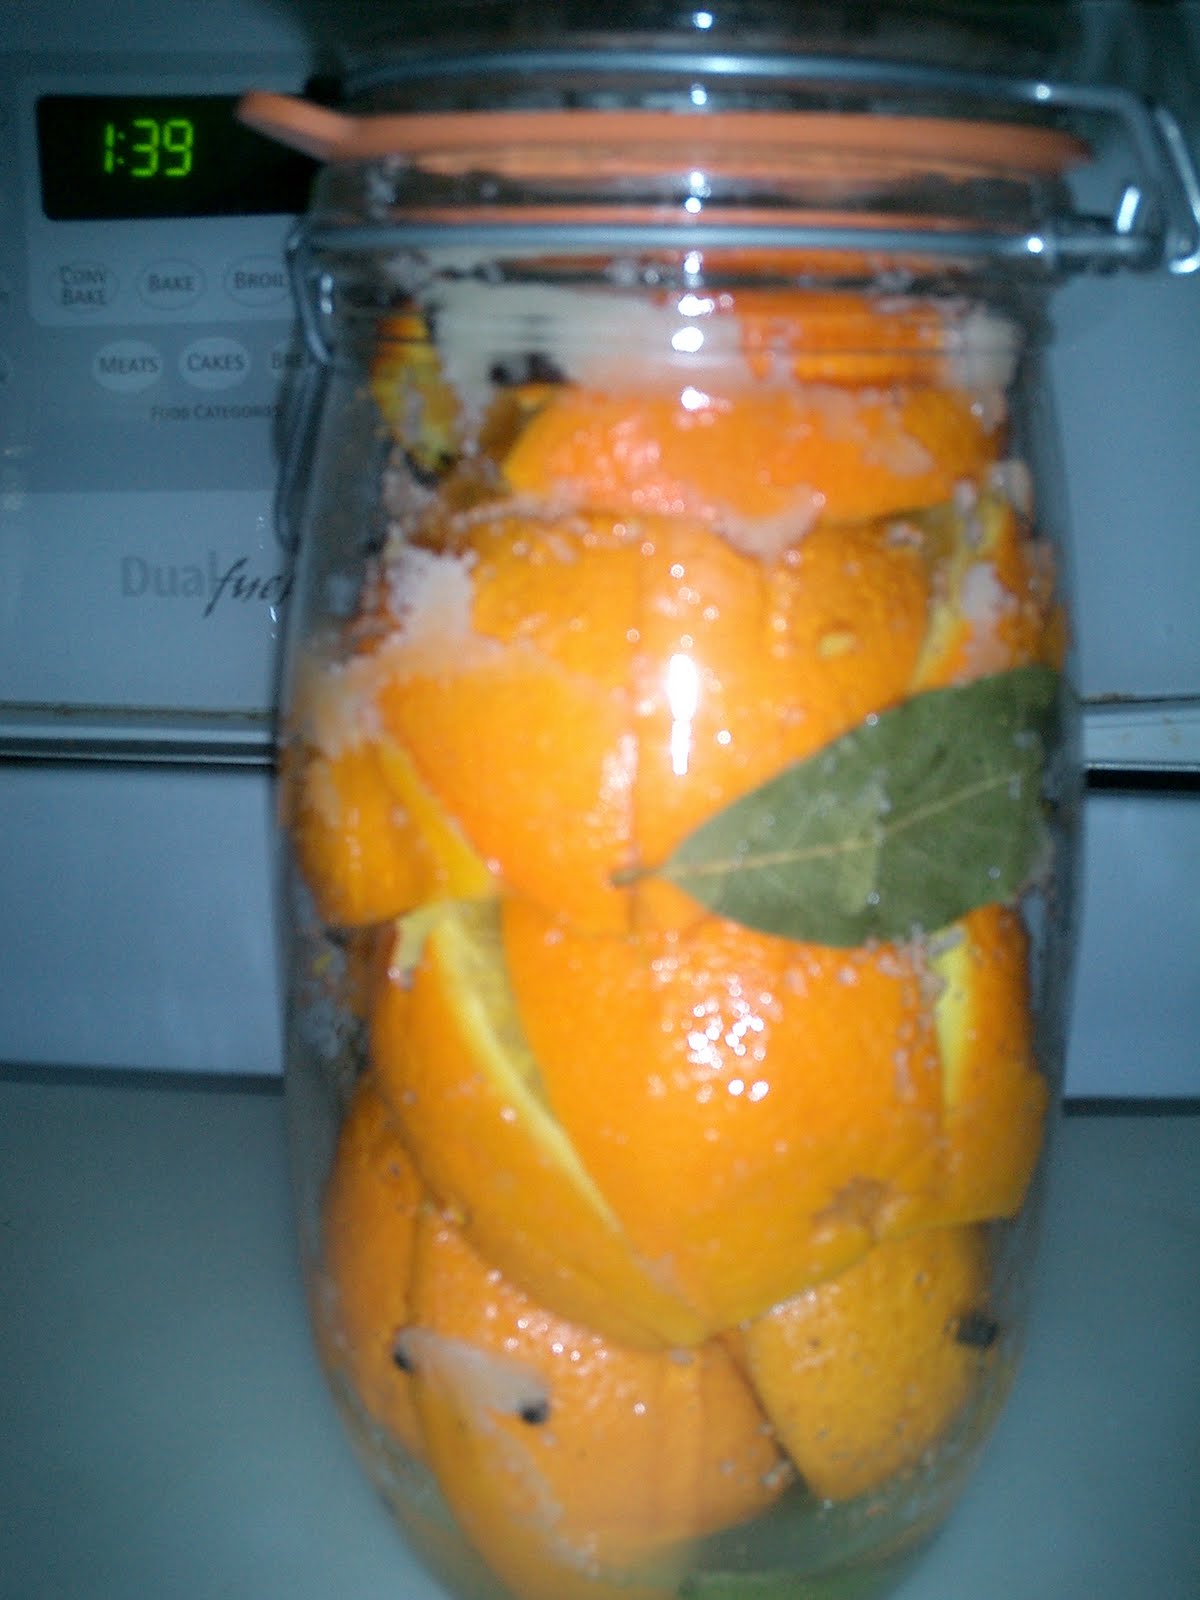
5 small oranges
1/3 cup PICKLING or CANNING SALT
2 bay leaves
1/2 tsp. black peppercorns
AFTER 1 WEEK
1 cup freshly squeezed orange juice
Same directions as for lemons, cut into sixths almost all the way through and pack 1 scant tablespoon of salt inside the cuts of the orange and place in jar.
To USE:
Cut the desired size piece of orange, returning the remaining orange to the jar. Scrape flesh and membranes from the orange rind. Cut rind into thin slices or mince to use in recipes.
*My oranges were not small. It is suggested to use a naval orange, and those are never small here. My lemons were also big. These will make tasty flavor additions to hummus, smoothies, rice and more!
Time to SPICE IT UP!!

So I was thinking. What spices do you use regularly? Cinnamon? Salt? Oregano? Paprika? Chili powder? Bouillon cubes? These are things to have in your food storage. Costco has some much loved spices for usually a good price. I am sure for about $50 you could seriously stock your spices and herbs! Think about it. At Costco, a 25-# bag of salt is around $3.00 !!! super cheap!
Ok, so don't think of just dry spices, what about bug juice (worcestershire sauce), soy sauce, mustard, vinegars, vanilla or other flavorings. Vanilla at costco is $6.00 for 16-fl. oz. good price! Good vanilla too.
I do not use distilled vinegar for cooking, we use it for cleaning. But we do use red wine vinegar, apple cidar vinegar, balsamic vinegar, soy sauce, mustards and horseradish. We also use vanilla, A LOT!
Making something as simple as potato soup can be made a little tastier with some salt, pepper, thyme or rosemary. And yes you definetly need some salt for potato soup.
Now if you prefer REAL salt, then yes, that will cost you more, about $55 - 85 per 25-# bag. More pricey, but it is a better salt for you than iodized. Although I stock both. Why? Because iodine helps prevent goiters, and no one wants those! Normally we would get our iodine from fish, but we don't eat a lot of fish.

Ok, so now that you are now thinking a bit about some spices.. DON'T stock spices you don't like, or don't use. That is just wasted money. BUT if you don't use a lot of a spice, but use it, go to Dollar tree or grocery outlet or some such place and pick up a small cheap bottle of it. I picked up a "the Spice Hunter" grinder of (salt free) garlic herb sensation, it contains garlic, onion, lime peel, red bell pepper, rosemary and basil. I used it on our chicken with some paprika and pepper too... The kids LOVED it! It was worth the whole $0.85 I spent on it. And when it is empty, I can reuse the jar as it is glass! I don't usually buy grinders, but this has stuff in it I would use, and the price was worth it!! I picked that up at Bimore in Enumclaw, over by Del's (feed store).
See so getting spices does not have to break the bank. And it wasn't out of my way. I went to Del's to get chicken feed, so just went one more block to bimore to see what they might have in stock.
Sunday, May 2, 2010
Children's Medicine REcall
Please check it out, then check your cupboards!!
The makers of Tylonal and Motrin for children are issuing a recall!! Please check it out here and make sure you take care of this :) Go to the link I provided and check to see if your kid's tylonal or motrin is on recall. IF it is, then you can request either a coupon for future bottle or a refund. I have 4 bottles of recalled children's motrin.. bummer. Well I will wait and get some new stuff when it is finally available.
The makers of Tylonal and Motrin for children are issuing a recall!! Please check it out here and make sure you take care of this :) Go to the link I provided and check to see if your kid's tylonal or motrin is on recall. IF it is, then you can request either a coupon for future bottle or a refund. I have 4 bottles of recalled children's motrin.. bummer. Well I will wait and get some new stuff when it is finally available.
Subscribe to:
Posts (Atom)